Metamodel
The Metamodel defines your platform's entire data structure — what types of cards exist, what fields they have, how they relate to each other, and how card detail pages are laid out. Everything is data-driven: you configure the metamodel through the admin UI, not by changing code.
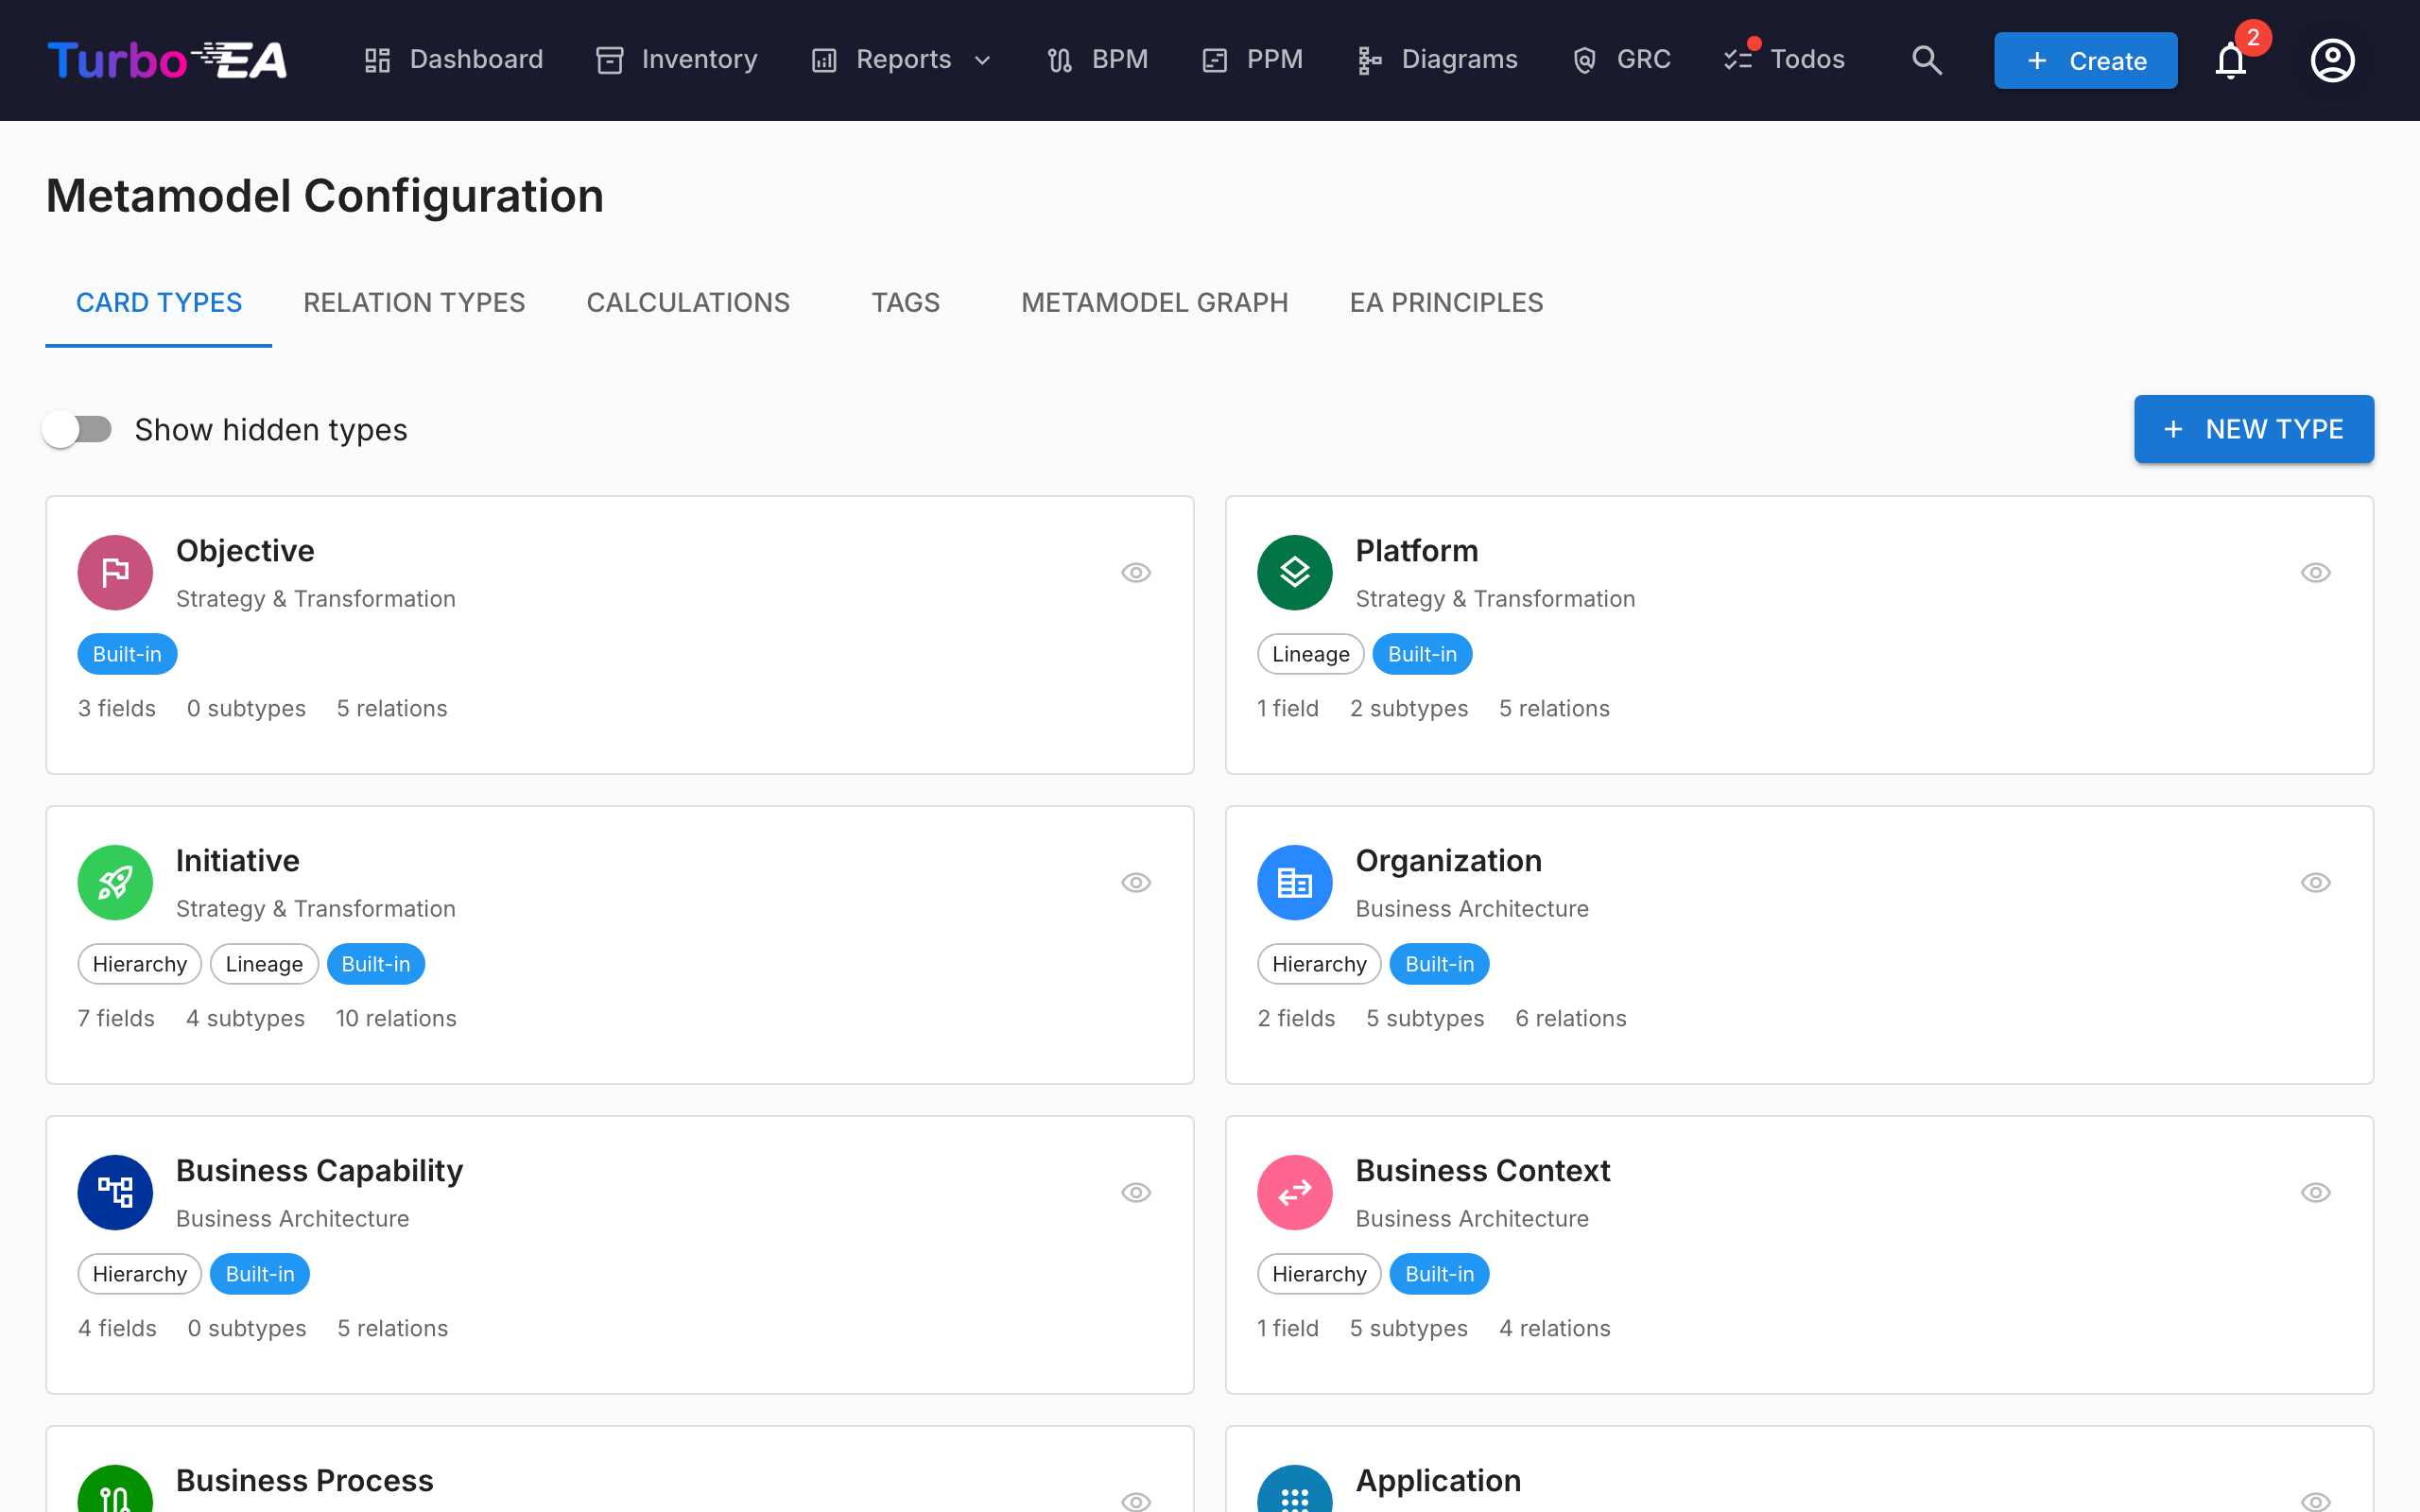
Navigate to Admin > Metamodel to access the metamodel editor. It has eight tabs: Card Types, Relation Types, Calculations, Tags, Metamodel Graph, EA Principles, Compliance Regulations, and Resources.
Card Types
The Card Types tab lists all types in the system. Turbo EA ships with 14 built-in types across four architecture layers:
| Layer | Types |
|---|---|
| Strategy & Transformation | Objective, Platform, Initiative |
| Business Architecture | Organization, Business Capability, Business Context, Business Process |
| Application & Data | Application, Interface, Data Object |
| Technical Architecture | IT Component, Tech Category, Provider, System |
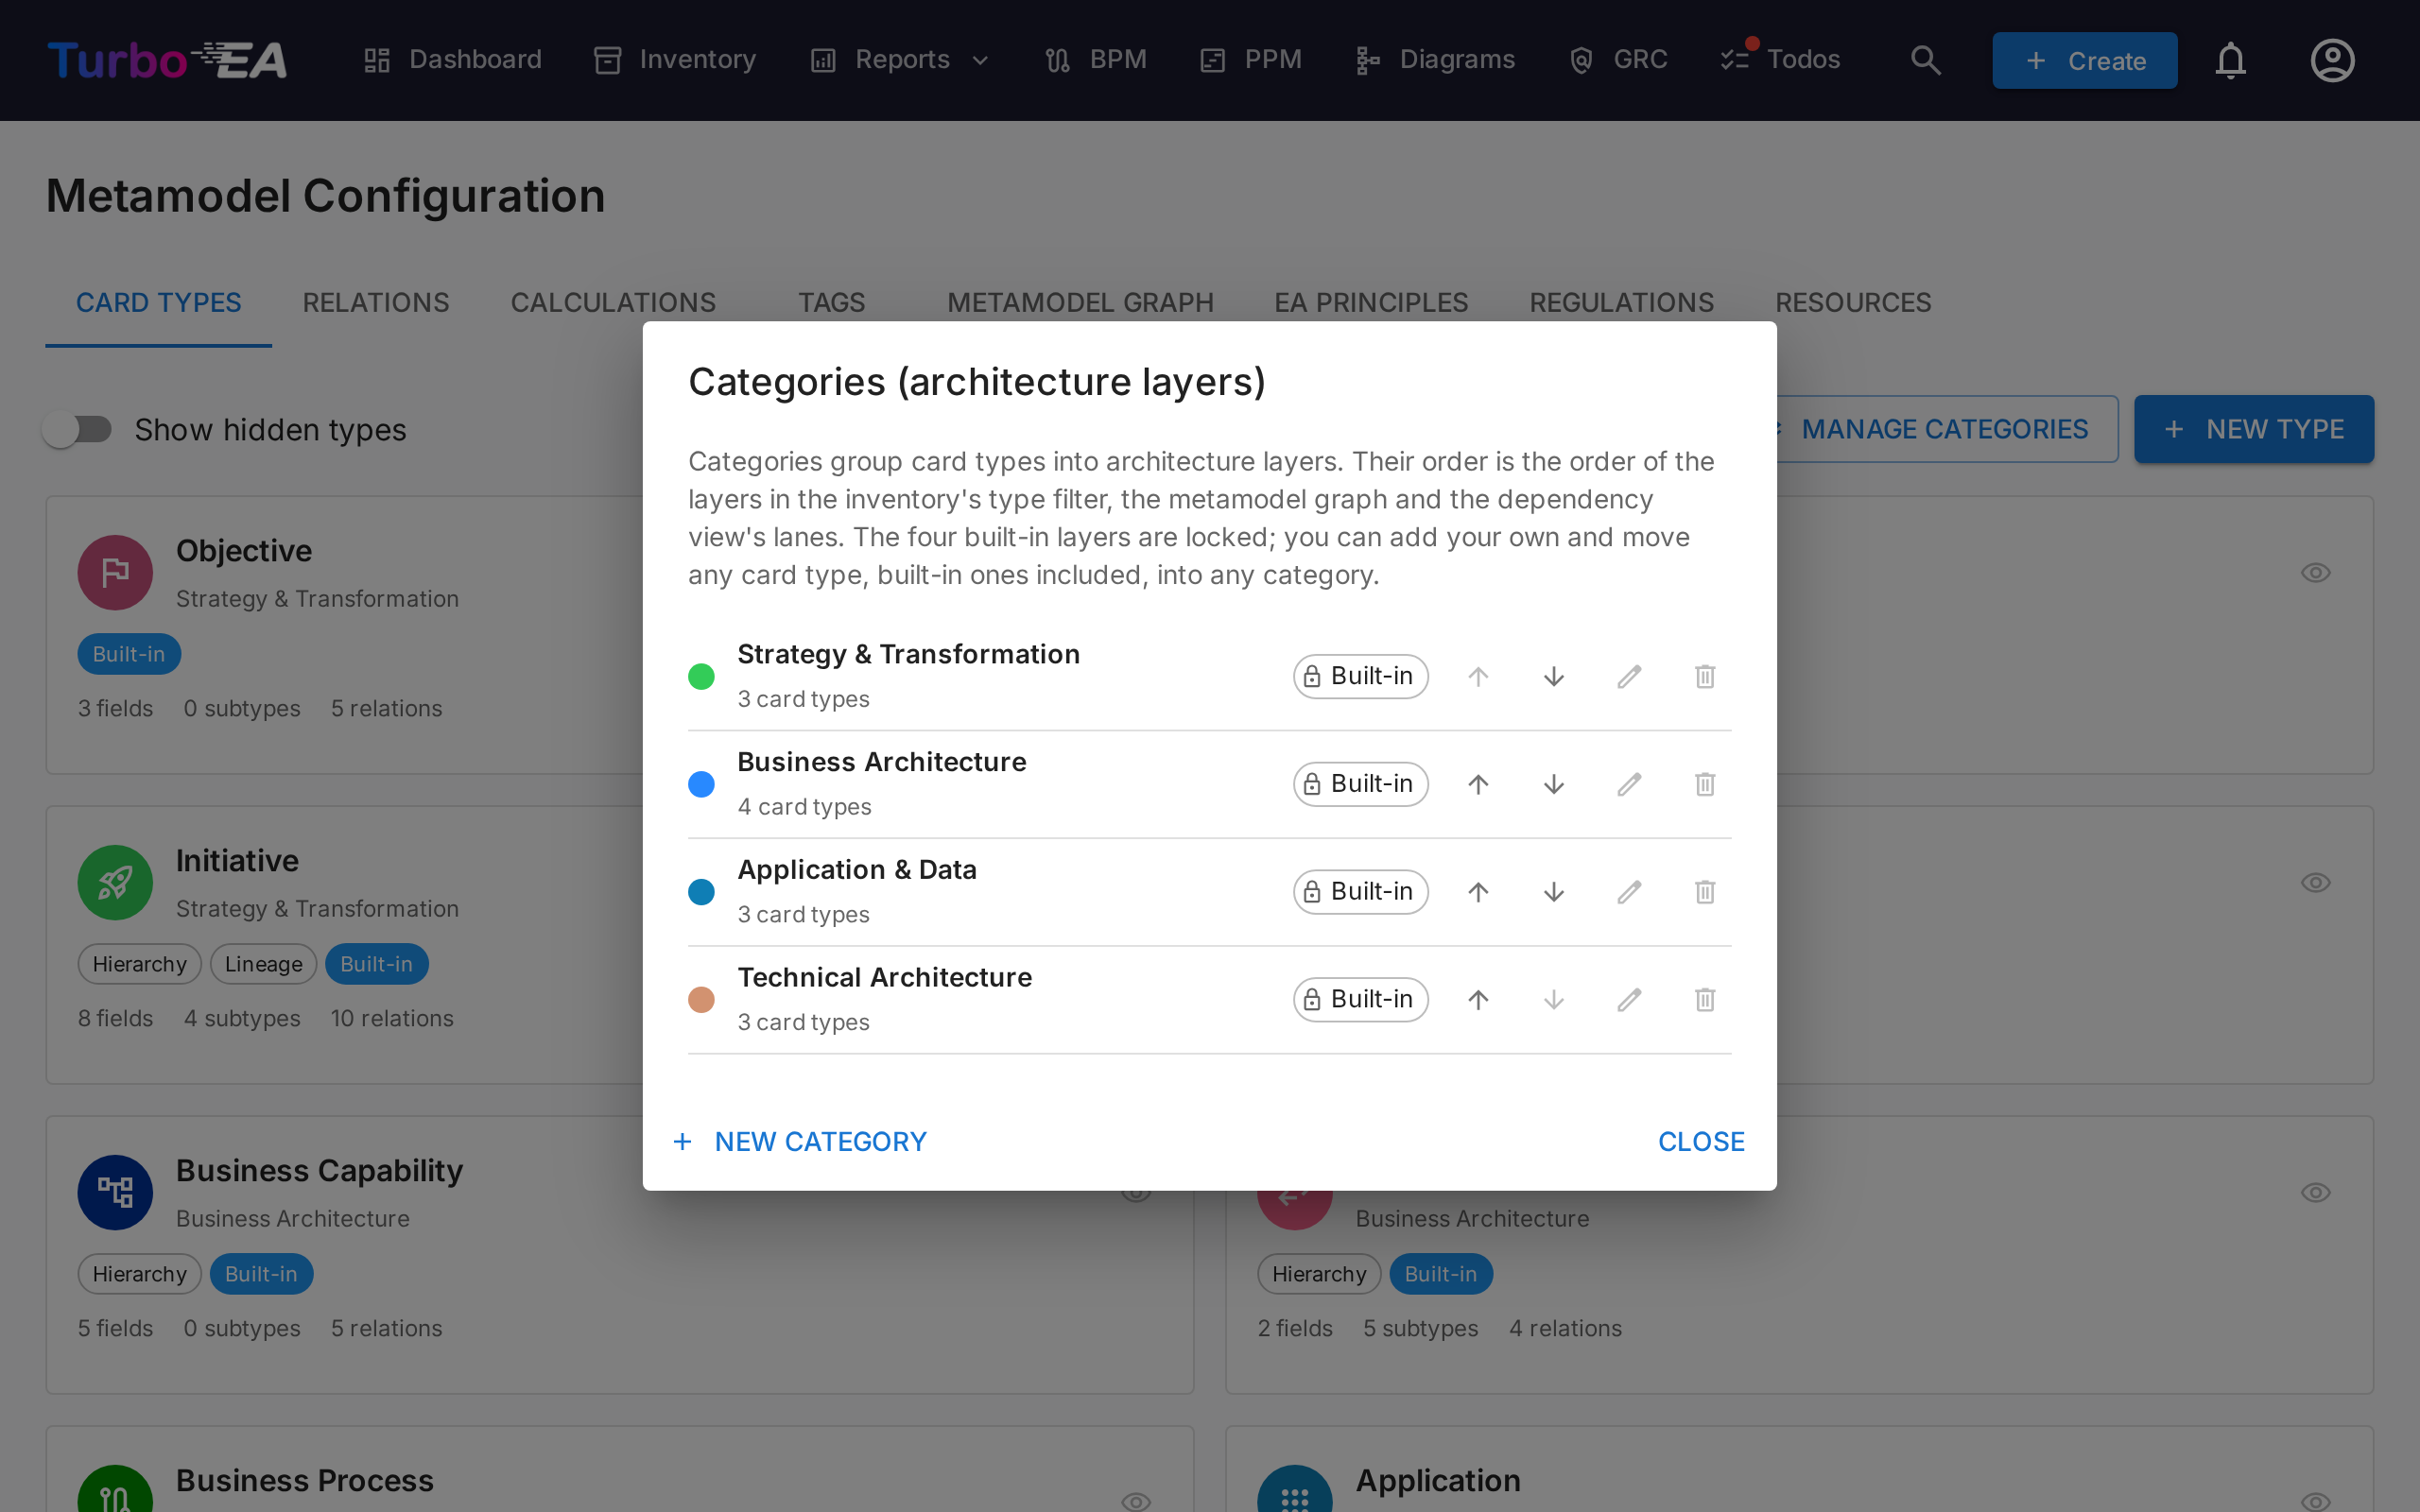
Categories (architecture layers)
Every card type sits in a category — the architecture layer it is grouped under. The category order is the order of the layers wherever they are drawn: the Inventory's type filter, the Metamodel Graph and the swim lanes of the Layered Dependency View, each shown in the category's color and in the reader's language.
- The four built-in layers are locked. Strategy & Transformation, Business Architecture, Application & Data and Technical Architecture cannot be renamed, recolored or deleted, and are translated into every supported language.
- Create your own. In the Category field of the type editor or of + New Type, type a name that does not exist yet and choose Create category "…". Pick a color, optionally add translations, and the type moves into the new category.
- Move any type. Built-in types can be moved too — for example, put Interface into a custom Integration layer.
- Manage categories. The Manage categories button next to + New Type lists every category with its color and the number of card types that use it. Use the arrows to change the layer order (a custom layer can sit between two built-in ones), the pencil to rename, recolor or translate a custom category, and the bin to delete one. A category still used by a card type cannot be deleted — move its types to another category first.
Creating a Custom Type
Click + New Type to create a custom card type. Configure:
| Field | Description |
|---|---|
| Key | Unique identifier (lowercase, no spaces) — cannot be changed after creation |
| Label | Display name shown in the UI |
| Icon | Google Material Symbol icon name |
| Color | Brand color for the type (used in inventory, reports, and diagrams) |
| Category | The architecture layer the type is grouped under — pick an existing category or type a new name to create one (see Categories) |
| Has Hierarchy | Whether cards of this type can have parent/child relationships |
Editing a Type
Click any type to open the Type Detail Drawer. Here you can configure:
Type Color
Every card type — including the built-in ones — has a customizable color used across the inventory, reports, dependency views, and diagrams. This lets you align Turbo EA with your organization's visual conventions (for example TOGAF/ArchiMate palettes: business elements in yellow/orange, applications in blue).
- Pick a color with the color swatch in the drawer. A hint appears when the chosen color has very low contrast against light or dark backgrounds.
- Built-in types show a reset button next to the color swatch whenever the color differs from the Turbo EA default, so you can always return to the standard palette.
- Text rendered on top of type colors (chips, diagram shapes) automatically switches between black and white for readability, in both light and dark mode.
- The picker shows a live preview beside the palette: the type name, chip, card icon, subtype, card ID pill, and a dependency-view node, rendered once for the light theme and once for the dark theme, updating as you pick.
Fields
Fields define the custom attributes available on cards of this type. Each field has:
| Setting | Description |
|---|---|
| Key | Unique field identifier |
| Label | Display name |
| Type | text, multiline_text, number, cost, percentage, boolean, date, url, single_select, or multiple_select. A percentage is a number from 0 to 100, shown as a progress bar and edited with a slider or typed exactly. A boolean is chosen from a Yes / No list, with None to clear it, and shows as a green Yes or blue No pill, or as — when unset, which the Inventory's (empty) filter matches |
| Options | For select fields: the available choices with labels and optional colors. Reorder them with the up and down arrows beside each option: menus and filters list the options in that order, and the chips of a multi-select value follow it on every card. |
| Help text | Optional guidance shown as a collapsible note under the field while a card is edited. It is written per language and can be set by any metamodel admin; on a field contributed by an extension it is read-only |
| Required | Whether the field is mandatory — see the enforcement rules below |
| Data quality | Each field's contribution to the score is managed in the Data quality panel — see Data quality scoring below |
| Read-only | Prevents manual editing (useful for calculated fields) |
How Required is enforced. Creating a card never requires these fields — cards can be created quickly and completed later. While any required field is still empty, the card's data-quality score is pinned to 0 and the card detail page shows a warning banner listing what must be filled. When a card section is edited, it cannot be saved until the required fields in it are filled, and the API rejects clearing a required field that already has a value. Boolean and read-only (calculated) fields are exempt.
Click + Add Field to create a new field, or click an existing field to edit it in the Field Editor Dialog.
Sections
Fields are organized into sections on the card detail page. You can:
- Create named sections to group related fields
- Set sections to 1-column or 2-column layout
- Organize fields into groups within a section (rendered as collapsible sub-headers)
- Reorder fields within a section by dragging, and move a field to a different section from its move action
- Take a field out of its group by dropping it on the Drop here to take a field out of its group zone at the bottom of any column that holds a group — the field lands at the end of that column, ungrouped
The special section name __description adds fields to the Description section of the card detail page.
Card ID
Toggle Card ID generation on to give cards of this type a stable, human-readable ID (for example APP-00001). The ID shows as a copy-to-clipboard pill next to the card's type on the detail page, as an optional sortable/filterable column in the inventory, in Excel exports, and in calculated-field formulas (via data.reference).
The number is always generated automatically; you only control the prefix. When you turn the toggle on, a suggested prefix (derived from the type name, e.g. APP-) is shown as text — click the pencil to change it. Two settings tune the number:
- Start at — the first number in the series (default
1). - Min digits — zero-padding width (default
5), so1renders as00001. It's a minimum; numbers widen once they exceed it. A live Example shows the first ID as you type.
IDs are globally unique, read-only, and never reused or changed once assigned. The number sequence is tracked per prefix across the whole workspace, so two card types that share a prefix form one continuous, collision-free series. Once any card of the type has an ID, the whole format — prefix, start, and min digits — is locked (the fields become read-only), so existing IDs can never drift; you can still turn generation off.
Saving the type never assigns IDs to existing cards — that bulk action is deliberately separate. New cards get their ID automatically on creation; to fill the existing backlog, use the dedicated Generate IDs button in the ID section (it shows how many cards still need one, runs on demand with a progress bar, and confirms when done). It is fill-only and idempotent — it only assigns IDs to cards that don't have one yet, never rewriting an existing ID.
Data quality scoring
A card's data quality score is a weighted measure of how complete it is. Every contributing factor — each field plus five built-in factors — is managed in one place: the Data quality tab of the card-type editor. (The editor is organised into tabs — Main, Relations, Stakeholder roles, and Data quality — with translations available from the icon in the header.)
Mandatory fields override the score. While any required field on a card is still empty, its score is pinned to 0 regardless of the weights — the weighted calculation only applies once every required field is filled (boolean and read-only fields are exempt; see the Required setting above).
Each factor has an importance set with a simple slider across four tiers, which also shows the underlying number:
- Ignore (0) — excluded from the score entirely.
- Normal (1) — counts once (the default).
- Important (2) — counts twice as much.
- Critical (3) — counts three times as much.
The panel lists the five built-in factors — Description, Lifecycle (whether any lifecycle date is set), mandatory Relations, mandatory Tags, and Stakeholder roles (a single slot, filled as soon as anyone is assigned to the card in a role that counts toward data quality) — followed by every field grouped by its section, each with the same slider. For example, set Lifecycle to Ignore for a type whose cards legitimately never carry dates, so they are not penalized.
A score composition bar at the top of the tab shows each factor's share of the maximum possible score, so you can see at a glance which factors dominate. In the Main tab's card layout, each field — and the built-in Description, Lifecycle and Relations sections — shows a small badge with its current tier number, so you can see the weighting without leaving that tab.
Changing any importance immediately re-scores every existing card of that type. New fields default to Normal, so they count toward the score as soon as you add them.
Subtypes (Sub-Templates)
Subtypes act as sub-templates within a card type. Each subtype can control which fields are visible for cards of that subtype, while all fields remain defined at the card type level.
For example, the Application type has subtypes: Business Application, Microservice, AI Agent, and Deployment. An admin might hide server-related fields for the SaaS subtype since they are not relevant.
Configuring field visibility per subtype:
- Open a card type in the metamodel admin.
- Click on any subtype chip to open the Subtype Template dialog.
- Toggle field visibility using the switches — fields turned off will be hidden for cards of that subtype.
- Hidden fields are excluded from the data quality score, so users are not penalized for fields they cannot see.
When no subtype is selected on a card (or the type has no subtypes), all fields are visible. Hidden fields preserve their data — if a card's subtype changes, previously hidden values are retained.
Renaming a subtype: click the pencil beside its chip, type the new label and press Enter (or click elsewhere); Escape cancels. Only the label changes: the key, which cards store, stays the same, and the subtype's translations (edited from the translations icon in the header) are left as they are.
Relations not required for a subtype:
A relation marked mandatory on the card type applies to every card of that type. When it does not fit one subtype — a SaaS application with no hosting IT component, say — open the Subtype Template dialog and tick it under Relations not required for this subtype. The list shows only the type's mandatory relations, each named by its verb as read from this card type. For cards of that subtype the relation no longer blocks approval, no longer counts against the data quality score, and card detail stops marking it Required; it still shows if the relation type is set to be visible. Cards of other subtypes, and cards with no subtype, still need it. Saving re-scores the type's existing cards straight away.
Stakeholder Roles
Define custom roles for this type (e.g., "Application Owner", "Technical Owner"). Each role carries card-level permissions that are combined with the user's app-level role when accessing a card. See Users & Roles for more on the permission model.
Each role has a key (the identifier stored on cards, used by the stakeholder:<role_key> import/export columns) and a label (what users see). The key follows the same convention as every other metamodel key — letters and digits only, starting with a letter, 3–50 characters, conventionally camelCase such as businessArchitect. It is filled in automatically from the label, so you rarely need to type one.
Each role also carries a Counts toward data quality switch. The data-quality score has a single stakeholders slot, and it is filled as soon as anyone is assigned to the card in a role where this is on. Turn it off for purely passive roles — the built-in Observer ships with it off, so watching a card never stands in for owning it. A type whose roles all have it off contributes no stakeholders slot at all. Flipping the switch re-scores every card of the type straight away.
Roles can be removed in two ways:
- Archive — the role stays on cards that already use it but can no longer be assigned, and it stops granting its card-level permissions. Archived roles are listed behind the Show archived toggle and can be restored at any time. This is the right choice for a role that has been genuinely used.
- Delete — permanent, and only offered while the role is unused. Turbo EA refuses to delete a role that anyone holds on a card of this type, that a survey targets, or that is the type's last remaining active role; the confirmation dialog says which of these applies and offers to archive it instead. This is the way to clean up a role that was created by mistake.
A role's key can be corrected as long as nobody holds the role — surveys that target it follow the rename automatically, and renaming the type's only role is fine since the role survives it. Once someone holds the role, the key is locked and the field explains why. Roles created before this convention keep the key they already have and go on working; only a new or changed key is checked.
Permissions
Card types can restrict what each app-level role may do with their cards. Open the Permissions tab in the type drawer for a matrix of roles against the five card actions — View, Create, Edit, Archive and Delete.

Every cell has three states:
- Inherit (the default) — the role's landscape-wide permission decides. The icon shows what that currently is, so you can see at a glance what the role would be allowed.
- Allow — the role may perform this action on cards of this type, even when it lacks the permission globally.
- Deny — the role may not perform this action on cards of this type, even when it holds the permission globally.
This is what lets you say "anyone may create Applications, but only the central team creates Organizations and Initiatives" without inventing a role per card type. Denying Create on a type also removes it from the create dialog, the diagram editor and the spreadsheet importer, so users are not offered an action that would only fail.
A few rules are worth knowing:
- Administrators are never restricted. The admin row is locked, and an admin keeps full access to every card type.
- Stakeholder roles still apply. Denying a role Edit on a type removes their landscape-wide ability to edit those cards; it does not remove the authority someone holds as the assigned owner of one particular card. See Users & Roles for how the two levels combine.
- Bulk edit follows a deny, not an allow. A type that denies Edit also blocks bulk edits of its cards; a type that allows Edit does not by itself grant the separate bulk-edit permission.
- Changes take effect for other users the next time they reload the app, the same as an edit to the role itself.
Hiding a card type from a role
Denying View hides the type from the role entirely. For its users, cards of that type do not exist: they are left out of the inventory, search, counts and exports, out of the relations and hierarchy on other cards, and out of every report, chart, dependency graph and dashboard, as well as the lists in BPM, PPM, GRC, decisions, diagrams and TurboLens. Opening such a card from a link shows not found rather than access denied, so the page does not even reveal that the card exists.
- Allowing View works the other way. A role that cannot browse the inventory at all can be allowed View on one type; its users then see the cards of that type, and only that type.
- Inherit reads two ways for View. In the inventory, on card pages, in search and in exports, inherit follows the role's landscape-wide View permission. In modules that have their own permission — reports, BPM, PPM, risks, decisions, diagrams, TurboLens — only an explicit Deny hides anything, so a role that may read reports but not browse the inventory keeps its reports.
- A View deny locks the other actions. A role that may not see a type cannot create, edit, archive or delete its cards either. The row's other cells show a lock icon and keep their stored values, which apply again once View is no longer denied.
- Stakeholders keep their cards. Someone assigned to a card through a stakeholder role that grants viewing still sees that card — and only that one — even when their app role may not view its type.
- A View deny on Initiative applies to PPM too. The PPM permission does not bring hidden initiatives back; the role sees only the ones it is a stakeholder on.
- Links you cannot see are kept. When someone edits the cards linked to a decision, a diagram or a process step, links to cards they cannot see are left in place.
- Architecture AI needs the whole landscape. The TurboLens Architecture AI reasons over every card, so it is unavailable to a role from which any card type is hidden.
A few things are deliberately not filtered, because they are publications or administration rather than browsing:
- published web portals and published diagrams;
- the drawing on a diagram and the text written in a decision or a Statement of Architecture Work (the cards linked to them are filtered);
- values computed by calculated fields, which are worked out across the whole landscape;
- the event log and live event stream for administrators, and the workspace export;
- surveys an administrator sent to the user;
- extensions, which act on behalf of the system rather than a user.
Translations
Click the Translate button in the type drawer toolbar to open the Translation Dialog. Here you can provide translations for all metamodel labels in each supported language:
- Type label — The display name of the card type
- Subtypes — Labels for each subtype
- Hierarchy link types — Labels for each hierarchy link type
- Sections — Section headings on the card detail page
- Fields — Field labels and select option labels
- Help text — A field's help text, listed under the field once it has been entered in the field editor. Editing it in English also updates the field's default help
- Stakeholder Roles — Role names displayed in the stakeholder assignment UI
Translations are stored alongside each card type and are resolved at render time using the user's selected locale. Untranslated labels fall back to the English default.
Deleting a Type
- Built-in types are soft-deleted (hidden) and can be restored. The delete button in the type editor is locked for them — use Hide type instead.
- Custom types — the ones you created — can be permanently deleted. Open the type, click the Delete type button in the header, and Turbo EA shows everything the deletion will take with it: the cards of the type (with their relations, stakeholders, comments and attachments), the relation types that connect it to other types, the calculations that target it and its stakeholder roles. Type the type's key to unlock Delete permanently. The deletion cannot be undone; archived cards of the type are deleted too, and every deleted card is recorded in the Security & admin log and in the event history.
Relation Types
Relation types define the allowed connections between card types. Each relation type specifies:
| Field | Description |
|---|---|
| Key | Unique identifier — suggested from your verb, editable while you create the relation type, and fixed once it exists |
| Label | Forward direction label (e.g., "uses") |
| Reverse Label | Backward direction label (e.g., "is used by") |
| Source Type | The card type on the "from" side |
| Target Type | The card type on the "to" side |
| Cardinality | n:m (many-to-many) or 1:n (one-to-many) |
Click + New Relation Type to create a relation, or click an existing one to edit its labels and attributes.
Each relation row also carries Visible and Mandatory switches for each of its two ends, naming the card type they apply to: Visible decides whether the relation shows on that type's card detail page, Mandatory whether it must be filled in. A relation type whose two ends are the same card type gets one pair of switches per direction, so the incoming side can be configured separately from the outgoing one.
The Label and Reverse Label fields are written in the language you are currently using — the field caption shows which one (for example Label (English)). Renaming a relation updates that language everywhere the verb appears: the Relations section on a card, the inventory relation columns, reports, portals and diagrams. Other languages keep their own wording until you translate them.
Use Manage Translations at the top of the Relations tab, above its sub-tabs, to translate every relation's verbs into each enabled language in one pass. Pick a language tab, fill in the wording next to the English source, and save — the counter on each tab shows how many verbs that language still needs. English is not listed here because it is the wording on the relation itself; a verb left untranslated falls back to it. The same dialog carries a separate Hierarchy link types section listing the vocabulary of every hierarchical card type, so the verbs and the link types are translated in one pass.
Hierarchy link types
For a card type with hierarchy switched on, you can define link types — a short vocabulary that labels each parent-child link. An Organization tree, for example, can mark one subsidiary as commercial and another as sales, without inventing a second relation type.
- On the Relations tab, open the Hierarchy link types sub-tab — every card type with hierarchy switched on is listed there. (The first sub-tab, Relation types, is the ordinary relation list.) A card type's own Relations tab shows the same thing as a single line at the top, scoped to that type.
- Click Edit link types, then add one entry per label with a key, a name and a colour.
- Translate the names with the Translate button, like any other metamodel label.
Editors then pick a link type on the card's Hierarchy section, or in the Inventory's Link type column. The label belongs to the child card, so it is cleared automatically when that card is moved to the top level.
Removing a link type does not rewrite the cards already using it: they keep the stored value and show it as an unknown link type until someone changes it, so nothing is lost if you remove an entry by mistake. The dialog tells you how many cards are affected before you confirm.
Relation attributes
Some relations carry extra attributes that you set on each individual link rather than on the relation type. For example, the built-in Organization → Application relation ("uses") has a Usage Type attribute — set it to Owner, User, or Stakeholder on each link. This lets you model an application that is owned by one Organization and used by others through a single relation type. The chosen value appears as a coloured chip in the card's Relations section; set it when adding the relation, or later via the edit icon on the relation row.
You can also create several relation types between the same pair of card types — for example an Organization that owns an application alongside one that uses it. Prefer an attribute when you are describing variants of a single relationship (it keeps one column in the inventory and one line on a diagram); create a second relation type when the relationships are genuinely different and deserve their own verbs, their own attributes, or their own filters. When a pair carries more than one relation type, the inventory still shows a single column for the related card type, and opening that cell gives you one section per relation type. On a card, each relation type keeps its own section: sections pointing at the same card type are shown together, and a card you have linked through more than one of them is marked Also … in each of its sections. A relation type whose two ends are the same card type — an Organization that has site another Organization — shows both verbs on a card, as two sections, and in the inventory as two filter rows and two editor sections; give such a type a reverse label, or both sections will read alike.
When a pair carries more than one relation type, reports, portals and surveys can target a specific one: the Portfolio report offers a group-by axis and a filter per relationship, the Capability Map adds a filter per relationship, portal filters and relation sections are labelled with their verb, and a survey's related to filter gains a Via relation picker. Choosing nothing still means “related through any of them”.
Managing relation values
Click the Manage relation values (tag) icon on any relation row to edit the values of its "type" attributes. You can:
- Add your own values to an existing picker — for example, a new Usage Type beyond Owner / User / Stakeholder.
- Add a brand-new type picker to a relation that has none, using Add type, including on built-in relations.
Built-in values (Owner, User, Stakeholder, the flow-direction values, …) are locked: they cannot be renamed, recoloured, or deleted. You can, however, hide a built-in value so it no longer appears in the picker on cards — an already-set value stays visible. Your own custom values are fully editable and can be removed.
Calculations
Calculated fields use admin-defined formulas to automatically compute values when cards are saved. See Calculations for the full guide.
Tags
Tag groups and tags can be managed from this tab. See Tags for the full guide.
EA Principles
The EA Principles tab lets you define the architecture principles that govern your organisation's IT landscape. These principles serve as strategic guardrails — for example, "Reuse before Buy before Build" or "If we Buy, we Buy SaaS".
Each principle has four fields:
| Field | Description |
|---|---|
| Title | A concise name for the principle |
| Statement | What the principle states |
| Rationale | Why this principle is important |
| Implications | Practical consequences of following the principle |
Principles can be activated or deactivated individually using the toggle switch on each card.
Importing from the Principles Catalogue
Turbo EA ships a curated reference catalogue of 10 industry-standard EA principles so you don't have to start from a blank page. Open the avatar menu in the top-right corner and pick Reference Catalogues → Principles Catalogue. From there you can:
- Search and browse the bundled principles (title, description, rationale, implications).
- Multi-select the entries you want and click Import — selected principles land in the EA Principles tab as standard, fully-editable rows.
- Re-import safely: principles that already exist (matched by their stable catalogue ID) are skipped, even if you've renamed them locally. The catalogue shows a green "Already imported" badge for these.
Use the catalogue as a starting point and then tailor each principle's title, statement, rationale, and implications to your organisation.
How Principles Influence AI Insights
When you generate AI Portfolio Insights on the Portfolio Report, all active principles are included in the analysis. The AI evaluates your portfolio data against each principle and reports:
- Whether the portfolio aligns with or violates the principle
- Specific data points as evidence
- Recommended corrective actions
For example, a "Buy SaaS" principle would cause the AI to flag on-premise or IaaS-hosted applications and suggest cloud migration priorities.
Metamodel Graph
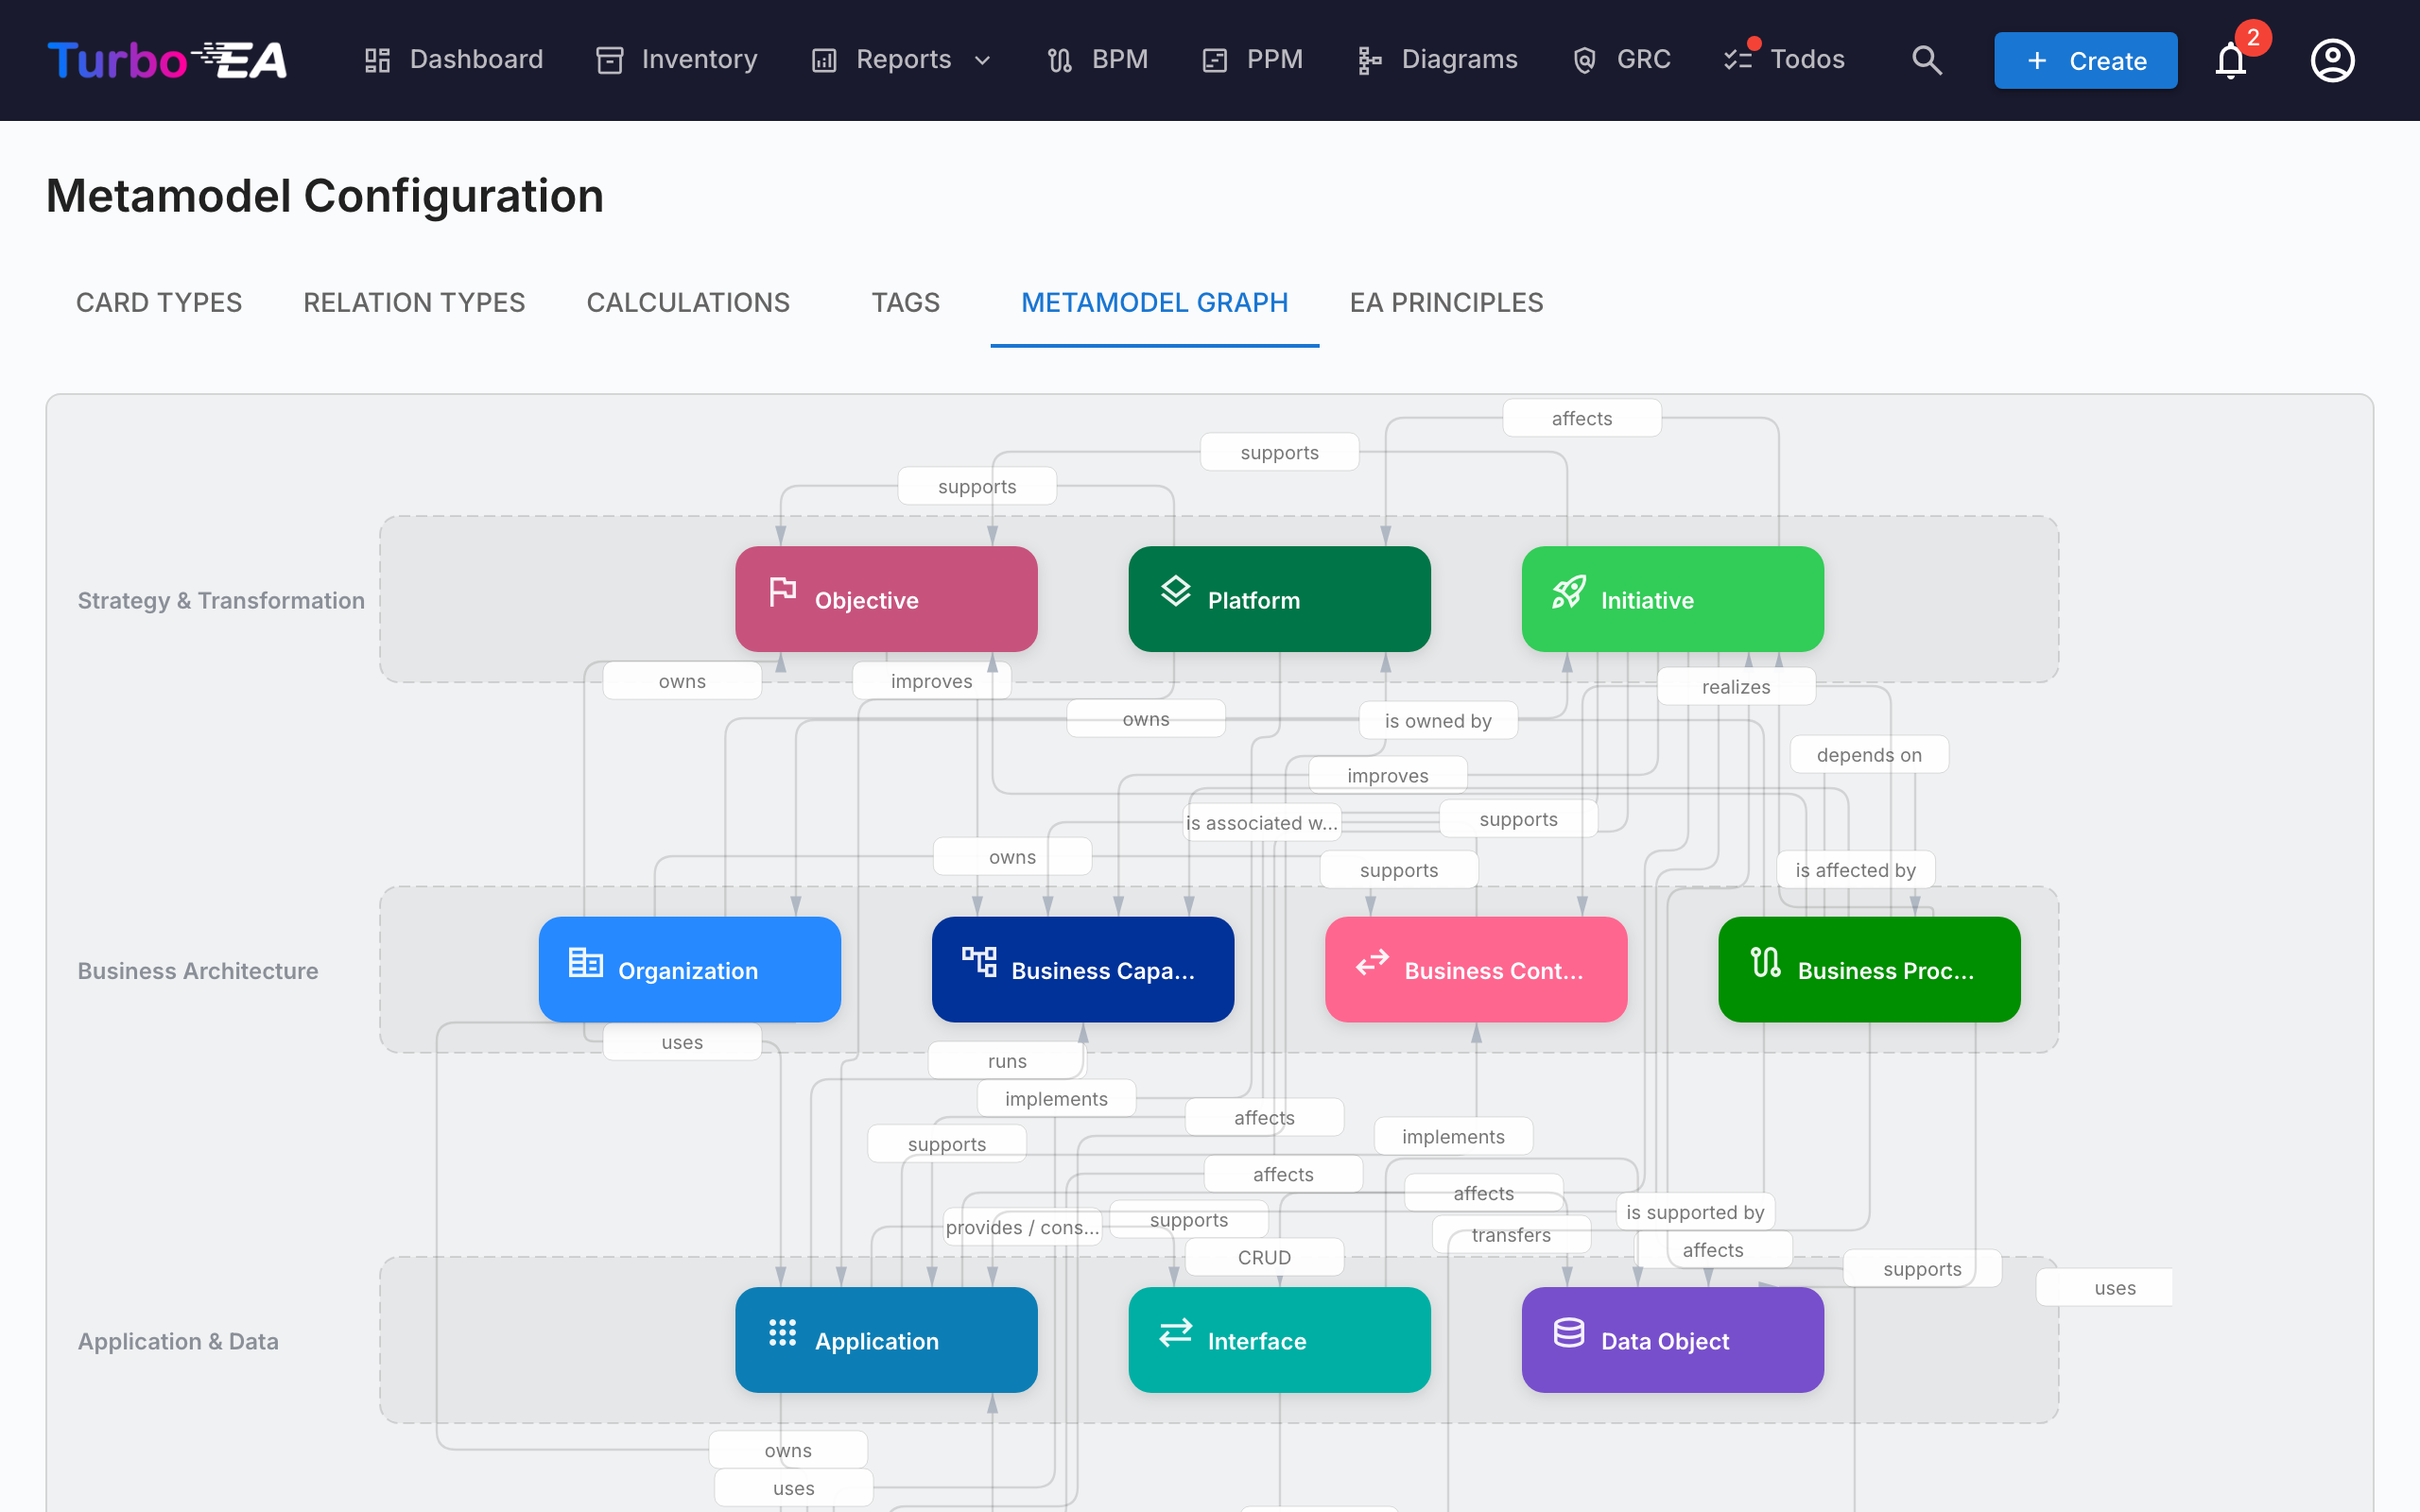
The Metamodel Graph tab shows a visual SVG diagram of all card types and their relation types. This is a read-only visualization that helps you understand the connections in your metamodel at a glance.
Compliance Regulations
The Compliance Regulations tab manages the regulatory frameworks that the GRC → Compliance scanner runs against. Six frameworks ship enabled by default:
| Regulation | Scope |
|---|---|
| EU AI Act | Requirements for AI / ML systems placed on the EU market |
| GDPR | EU General Data Protection Regulation |
| NIS2 | EU Network and Information Security Directive 2 |
| DORA | EU Digital Operational Resilience Act for financial entities |
| SOC 2 | AICPA Service Organization Controls Trust Services Criteria |
| ISO/IEC 27001 | Information security management system standard |
For each row you can:
- Enable / disable the regulation with the toggle — disabled frameworks are skipped on every subsequent scan and their findings are excluded from the dashboards. Existing findings are preserved (not deleted) in case you re-enable later.
- Edit the title, scope description and prompt context used by the LLM.
- Add a custom regulation with + New Regulation — for example, HIPAA, internal policies, or sector-specific frameworks. Custom regulations are first-class: they appear in the per-regulation tab, contribute to the overall compliance score, and support all the same finding actions (acknowledge, accept, promote to Risk).
- Delete a custom regulation — built-in regulations cannot be deleted, only disabled.
The compliance scanner and risk-promotion flow work even when no AI provider is configured — manual finding entry, status transitions and the promotion-to-Risk path all stay available. AI is only required when you actually trigger a new scan.
Resources
The Resources tab manages the two lists offered on every card's Resources tab:
- Link types — the category of a document link (e.g. Documentation, Contract, Security). Each link type also carries an icon shown next to the link.
- File categories — the category assigned to an uploaded file attachment.
For each list you can:
- Add an entry — give it a key (a lowercase identifier stored on cards, fixed once created), a display label, and — for link types — an icon.
- Edit the label, icon, sort order, and per-language translations of any entry, including the built-in ones.
- Enable / disable an entry with the toggle — disabled entries disappear from the picker but existing values on cards are preserved.
- Delete a custom entry — built-in entries cannot be deleted, only disabled.
A built-in Contract link type ships enabled by default. Both lists are included in Workspace Transfer, so your customisations clone between instances.
Card Layout Editor
For each card type, the Layout section in the type drawer controls how the card detail page is structured:
- Section order — Drag sections (Description, EOL, Lifecycle, Hierarchy, Tags, Relations, and custom sections) to reorder them
- Visibility — Hide sections that are not relevant for a type
- Default expansion — Choose whether each section starts expanded or collapsed
- Column layout — Set 1 or 2 columns per custom section
- Move fields between sections — Use a field's move action (next to its edit and delete buttons) to relocate it to another section, keeping its configuration